Here is a selection of different sprig moulds .
Close up of a shell mould.
A few basic tools will be needed. A fetling knife, wire cutter, wooden knife tool, rolling pin, and something to work on that the clay won't stick to.
Use the wire cut off tool to cut a 3/4 inch slab.
Using the wire cut off tool.
The slab is about 3/4 inch thick
Use the rolling pin to thin and elongate the slab.
Another method is to pinch off small pieces of clay. Pinch off the amount you will need for the sprig mould.
Press the clay into the mould
Really work it in with your fingers and thumb. Compress it very well and work out any air bubbles.
This is the inside of the shell mould after the clay has been pressed in.
Using the rolled out slab, cut off a section of clay that will fit the sprig mould your using. This one is the half light bulb.
Use your fingers to press and compress the clay slab in the mould. Work out all the air that is trapped between the clay and the mould.
Use the wooden knife tool to trim the extra clay from the mould. (note: only use wooden tools on plaster moulds. Metal ones will cut and gouge the mould. Possibly contaminating your clay!)
Remove the extra clay.
If you find that the clay is a little thin, add some more clay. The clay should be approximately 1/4 to and 1/8 inch thick.
Coil of clay being added to thicken the wall.
This is a two piece parakeet mould. Originally it was used for slip casting but I use it for press moulding.
Before you put the two halves of the parakeet mould together you must score and slip the edges.
I use a serrated metal rib to score.
Putting the halves together.
Make sure they are lined up.
Press the two halves together with your hands.
Wait approximately 5 minutes and open the mould. The parakeet usually sticks in one side and releases from the other. Gently wiggle the parakeet to get it release from the other side of the mould.
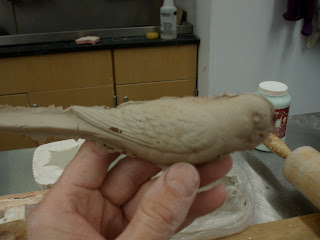
The Parakeet out of the mould.
The Light bulb out of the mould.
The shell out of the mould.


